It's Springtime in React Town
One joy of web development is its short feedback loop. Change a CSS property: now it’s red! Seeing my work right in the browser, interacting with it, and being able to send it to friends, makes the web a great platform for creative expressions of all kinds. Many powerful new ways to express creativity and personality have sprung up as the web has grown and evolved.
That’s what makes me excited about react-spring, a way to “bring your components to life with simple spring animation primitives”. React’s declarative programming model has empowered web developers around the world to build predictable, interactive user interfaces and react-spring does the same for animations. If you’ve worked with React, you know it makes handling state, data that changes over time, a breeze.
Over the course of this post, I'll show you how react-spring makes working with animations as easy as working with state. Let's dive into some code!
💡 All code samples in this post are editable, hack away!
Code Exploration
To change the scale of a button on hover, I create some state:
Change that state onMouseOver and onMouseOut of the button
And conditionally set the transform CSS property on the button style based on the active state.
There's no such Spring as bad publicity
Animating this button is as easy as dropping in a new hook useSpring that reacts to the active state.
🤔 Consider using CSS animations for simple hover interactions like this. We'll build on this example though. Just wait! 😉
There are a couple subtle changes to make this work:
Add the useSpring hook and move the CSS properties and conditions inside the object it receives. useSpring is imported from react-spring
Change the button element into a animated.button. animated is imported from react-spring.
Wire up the "animated" props from useSpring to our buttons style prop.
And just like that, you've animated your React Component! The above is a pretty simple animation, though, I'd recommend using CSS animations if you're looking for a simple hover interaction. So, let's look at a more involved animation to see where the power of react-spring really kicks in!
Spring It On
💡 Try editting the defaultrotationorscaleprops' value to a larger number and see what happens!
Let's walk through the changes needed to make this interaction possible:
- First, you'll notice I got rid of the
activestate. If your hover state only affects style in your render, then consider just using CSS. - I setup a refs that will be used in calculating the animated button's size and location. This is necessary for the
calcfunction to work. I haven't included that function because, Math. If you want to see it, check out the source.
- Next, I create the spring. It holds an array of the
xrotation,yrotation and thescalevalues for our transform, respectively. I've also configured the spring's dynamics a bit to make the animation more playful and bouncy. You may notice I'm usinguseSpringa bit differently. You can optionally destructure asetfunction for triggering the spring manually.
- I then add the
buttonRefand mouse event handlers to theanimated.button.
- In
onMouseMoveI recalculate and set the new spring value. The calculation is based on therotationandscaleprops, which control how dramatic the animation is, thexandycoordinates of the mouse, and the size/location of the button. onMouseLeavesets the spring back to the initial values.
- Finally, the
transformstyle is set on the button using the springstofunction which allows me to transform the spring values into the CSS rotations/scale. ex:transform: perspective(800px) rotateX(10deg) rotateY(-10deg) scale(1.2).
Too much of a good Spring
As you can see, things can get out of hand quite quickly when it comes to animation! react-spring is super powerful. With a couple of hooks, some creativity, and a little math, we made a fun interactive button. But with great power, comes great responsibility.
When building animations, it's tempting to put them everywhere and make them extra "springy". However, consider the different kinds of users that may use your site.
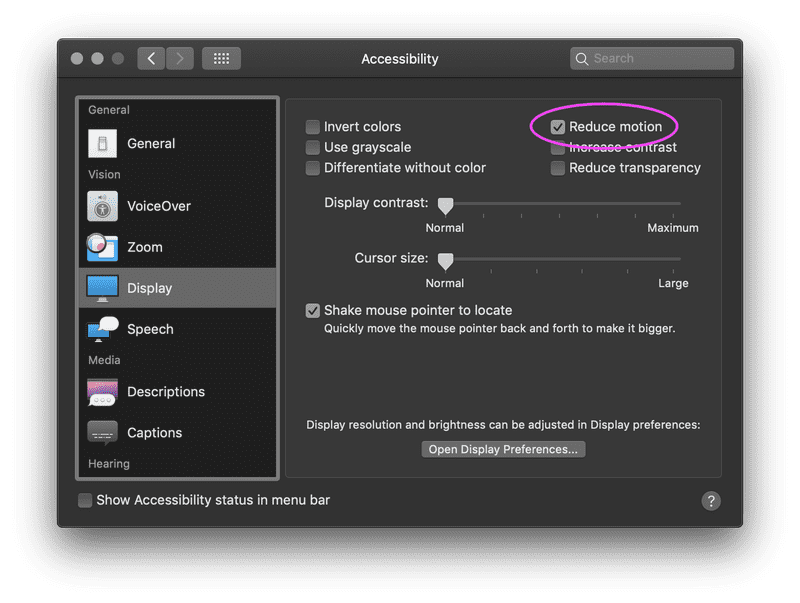
Vestibular dysfunction, a balance disorder of the inner ear, is surprisingly common among US adults. A study from the early 2000's found that approximately 69 million Americans had vestibular dysfunction which results in vertigo, nausea, migraines and hearing loss. Many people affected by vestibular dysfunction will choose to set the "Reduce motion" setting in their OS. In macOS it's found in the accessibility settings.

To avoid making your users sick, consider using the prefers-reduced-motion media query to disable or lessen animations in your app. I even made a hook out of it:
🔥 I turned this into a library called react-reduce-motion. It implements useReducedMotion for web and react native.To use the hook, you can call it at the top of your function component, and use its return value to decide if to apply the animation or the default style.
💡 If your OS supports "Reduce motion", try enabling it and interacting with the button below:
💡 You could also skip animations all together by setting the skipAnimation Global in react-spring:All good Springs come to an end
I'm really excited about react-spring. With very little code, you can add a bit of personality to your app. But, as always, it's imperative that accessibility doesn't suffer for the sake of "cool" interactions. react-spring could bake an accessibility solution into the library by allowing a config option or shipping the above hook to help devs respect the reduce motion media query. Until then, it's on you to make sure your app is usable by everyone!
So, go make your app springy with react-spring! But not too springy... 😉